Step 3: pyATS Capabilities using the pyATS Shell
Value Proposition: pyATS is a powerful automation framework that streamlines network testing and validation, enabling businesses to accelerate service delivery, reduce operational costs, and improve network reliability. By providing an interactive shell for developing and executing tests, pyATS empowers network engineers and developers to quickly prototype, validate, and troubleshoot network configurations and behaviors in a flexible and efficient manner. This interactive approach fosters a faster feedback loop, enabling rapid iteration and facilitating a more agile development process.
pyATS has an interactive shell for developing tests, and it is executed from a Bash shell in the following way:
pyats shell --testbed-file <testbed_file_name>
Note
The pyATS interactive shell will be called pyATS shell throughout this guide
Let’s begin with the pyATS shell, using it with pyats_testbed.yaml, which we’ve seen in the previous task.
You will be using the following pyATS methods throughout this task:
pyATS connect
pyATS execute
pyATS parse
pyATS learn
pyATS diff
Enter the following command to run the pyATS shell command from the Bash shell and specify the YAML testbed file as the parameter. This shell is where you can run the Python code.
Tip
The interactive shell might take some time to load (approximately 20 seconds)
pyats shell --testbed-file pyats_testbed.yaml
The output of the command should contain the following (the version of Python might differ):
Welcome to pyATS Interactive Shell
==================================
Python 3.10.12 (main, Nov 20 2023, 15:14:05) [GCC 11.4.0]
Check the devices included in the lab’s testbed.
testbed.devices
The output of the command should contain the following:
TopologyDict({'asav-1': <Device asav-1 at 0x7f5342e17210>, 'csr1000v-1': <Device csr1000v-1 at 0x7f5342deced0>, 'nx-osv-1': <Device nx-osv-1 at 0x7f5341998890>})
Create variables (Python objects) to call devices easily (nx - ‘nx-osv-1’ device, asa -‘asav-1’ device):
nx = testbed.devices['nx-osv-1']
asa = testbed.devices['asav-1']
Connect and collect raw output from devices.
Connect to devices from the pyATS shell:
nx.connect()
asa.connect()
Let’s prepare for our first test and collect the output of the show inventory command from the devices.
nx_output = nx.parse('show inventory')
asa_output = asa.parse('show inventory')
Verify the collected information for each command. Pay attention to the output of both executed methods returned as plain text (string type in Python):
nx-osv-1#
Out[6]: 'NAME: "Chassis",  DESCR: "Nexus9000 9000v Chassis" \r\nPID: N9K-9000v,  VID: V02 ,  SN: 9OQ8QSK7JX1 \r\n\r\nNAME: "Slot 1",  DESCR: "Nexus 9000v Ethernet Module" \r\nPID: N9K-9000v,  VID: V02 ,  SN: 9OQ8QSK7JX1 \r\n\r\nNAME: "Fan 1",  DESCR: "Nexus9000 9000v Chassis Fan Module"  \r\nPID: N9K-9000v-FAN,  VID: V01 ,  SN: N/A \r\n\r\nNAME: "Fan 2",  DESCR: "Nexus9000 9000v Chassis Fan Module" \r\nPID: N9K-9000v-FAN,  VID: V01 ,  SN: N/A \r\n\r\nNAME: "Fan 3",  DESCR: "Nexus9000 9000v Chassis Fan Module" \r\nPID: N9K-9000v-FAN,  VID: V01 ,  SN: N/A'
asav-1#
Out[7]: 'Name: "Chassis", DESCR: "ASAv Adaptive Security Virtual Appliance"\r\nPID: ASAv, VID: V01, SN: 9AWXBH2QJP7'
Convert the output to structured data using the parse command.
Import pprint python module to view the collected output in a better format.
from pprint import pprint
Run the parse command to convert the device output into a Python dictionary, storing the device data as a set of key-value pairs.
nx_output = nx.parse('show inventory')
Verify collected information using the pprint command.
pprint(nx_output)
The output of the command should contain the following:
{'name': {'Chassis': {'description': 'Nexus9000 9000v Chassis',
                    'pid': 'N9K-9000v',
                    'serial_number': '9EIFZPG7ZAM',
                    'slot': 'None',
                    'vid': 'V02'},
        'Fan 1': {'description': 'Nexus9000 9000v Chassis Fan Module',
                    'pid': 'N9K-9000v-FAN',
                    'serial_number': 'N/A',
                    'slot': 'None',
                    'vid': 'V01'},
        'Fan 2': {'description': 'Nexus9000 9000v Chassis Fan Module',
                    'pid': 'N9K-9000v-FAN',
                    'serial_number': 'N/A',
                    'slot': 'None',
                    'vid': 'V01'},
        'Fan 3': {'description': 'Nexus9000 9000v Chassis Fan Module',
                    'pid': 'N9K-9000v-FAN',
                    'serial_number': 'N/A',
                    'slot': 'None',
                    'vid': 'V01'},
        'Slot 1': {'description': 'Nexus 9000v Ethernet Module',
                    'pid': 'N9K-9000v',
                    'serial_number': '9EIFZPG7ZAM',
                    'slot': '1',
                    'vid': 'V02'}}}
Since the information is collected in a Python dictionary, we can call any value using its corresponding key. Let’s collect the serial number of the chassis using its key.
nx_serial = nx_output['name']['Chassis']['serial_number']
pprint(nx_serial)
Collect features state using the learn command.
Run the learn command to get the state of the feature (ospf in our case) into a Python dictionary, which stores the device data as a set of key-value pairs.
ospf_state_before = nx.learn('ospf')
Print collected output to observe the structure of the Python dictionary.
pprint(ospf_state_before.info)
Run the parse command to collect the output of show interface in the network.
int_before = nx.parse('show interface')
Let us now simulate a failure in the topology, shutting down the interface Ethernet1/1 on the device nx-osv-1.
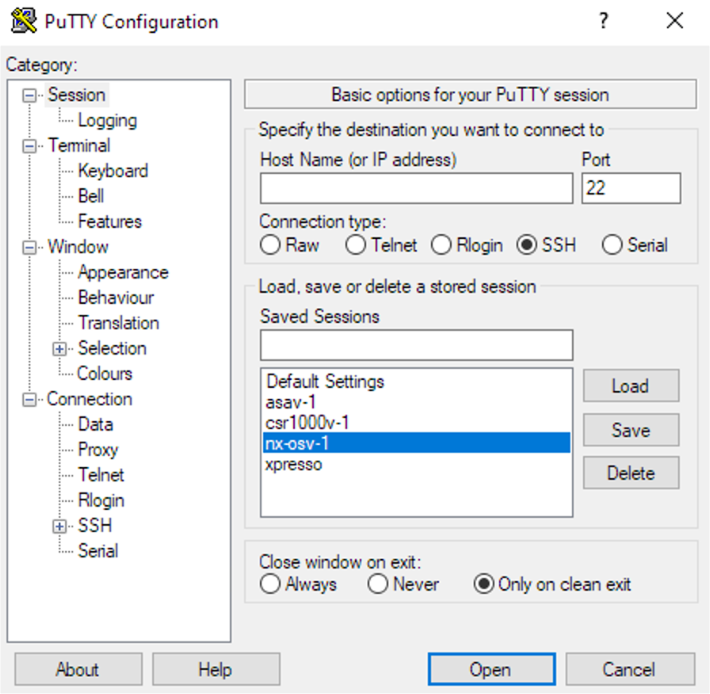
Open the Putty terminal using the shortcut on the desktop.
Connect to nx-osv-1 using the password cisco
Disable (using the shutdown command) interface Ethernet1/1 on nx-osv-1. Issuing the following commands in the console of nx-osv-1:
configure terminal
interface Ethernet1/1
shutdown
In the pyATS shell, run the learn command to get the state of the feature (ospf in our case) into a Python dictionary, which stores the device data as a set of key-value pairs.
ospf_state_after = nx.learn('ospf')
Import the PyATS Diff package and compare the previous (working) and current state (failed) to understand what has changed and then troubleshoot the problem.
from genie.utils.diff import Diff

diff = Diff(ospf_state_before.info, ospf_state_after.info)
diff.findDiff()
print(diff)
Note
Diff is one of Genie’s additional Useful Libraries. In the next step, we will explore more useful libraries such as Dq.
PyATS Diff can compare outputs of structured data collected by the parse command.
Convert the show interface command into a Python dictionary using the parse method.
int_after = nx.parse('show interface')
Compare the output before and after using the PyATS Diff package.
diff2 = Diff(int_before, int_after)
diff2.findDiff()
print(diff2)
Enable (using the no shutdown command) interface Ethernet1/1 on nx-osv-1. Execute the following commands in the console of nx-osv-1:
configure terminal
interface Ethernet1/1
no shutdown
Exit the pyATS shell using the exit command and proceed to the next step.
PyATS’ parse, learn, and diff commands can also be executed directly on a Linux Shell.
Observe PyATS capabilities from Linux Shell running the pyATS parse command from a Linux Shell:
pyats parse "show interface" --devices nx-osv-1 --testbed-file pyats_testbed.yaml --output parse-work/Run pyATS learn command from Linux Shell for the OSPF feature:
pyats learn ospf --devices nx-osv-1 --testbed-file pyats_testbed.yaml --output working/
Disable (using the shutdown command) interface Ethernet1/1 on nx-osv-1.
configure terminal
interface Ethernet1/1
shutdown
Return to the Linux Shell, and collect the output by running the pyATS parse command from the Linux Shell:
pyats parse "show interface" --devices nx-osv-1 --testbed-file pyats_testbed.yaml --output parse-failed/Run the pyATS learn command from the Linux Shell for the OSPF feature:
pyats learn ospf --devices nx-osv-1 --testbed-file pyats_testbed.yaml --output failed/
Run the pyATS diff command for the parsed commands from the Linux Shell:
pyats diff parse-work parse-failed
cat ./diff_nx-osv-1_show-interface_parsed.txt
Run the pyATS diff for the previously learned states from the Linux Shell:
pyats diff working failed
cat ./diff_ospf_nxos_nx-osv-1_ops.txt
Don’t forget to enable (using the no shutdown command) interface Ethernet1/1 on nx-osv-1:
configure terminal
interface Ethernet1/1
no shutdown
Section author: Luis Rueda <lurueda@cisco.com>, Jairo Leon <jaileon@cisco.com>